Sharing Files in OneDrive
The folders and files on your OneDrive are private until you choose to share them. There are four different ways to share OneDrive files and folders, depending on how you access OneDrive:
Desktop App For PC
- Open the File Explorer app from the Windows menu.
- Find OneDrive listed in the left navigation menu and click on it. You will now see all your files and folders that are stored on OneDrive.
- Right-click on the file or folder you’d like to share. A pop-up menu will appear.
- Click on the menu option Share (make sure it has the OneDrive cloud icon to the left).
Desktop App for Mac
- Open Finder (where your applications are housed) and go to the OneDrive folder.
- Click on the folder or file you want to share.
- Open the sub menu to find Share with the OneDrive logo then select the folder or file you’re interested in sharing.
Browser
- Find the file or folder you want to share.
- Click on the three dots that appear to the right of the file or folder name.
- From the dropdown menu that appears, select Share.
- A pop-up will appear that displays the automated or most recent sharing settings for this file or folder.
- To customize the sharing options on this file or folder, click the gear icon that appears near the top right of the pop-up.
Mobile Apps
- For both Apple and Android phones, download the OneDrive app.
- When you open up the app, you will see a list of your files and folders.
- Find the file or folder you’d like to share and click the three dots to the right of that file or folder’s name.
- From the menu that appears, click Share.
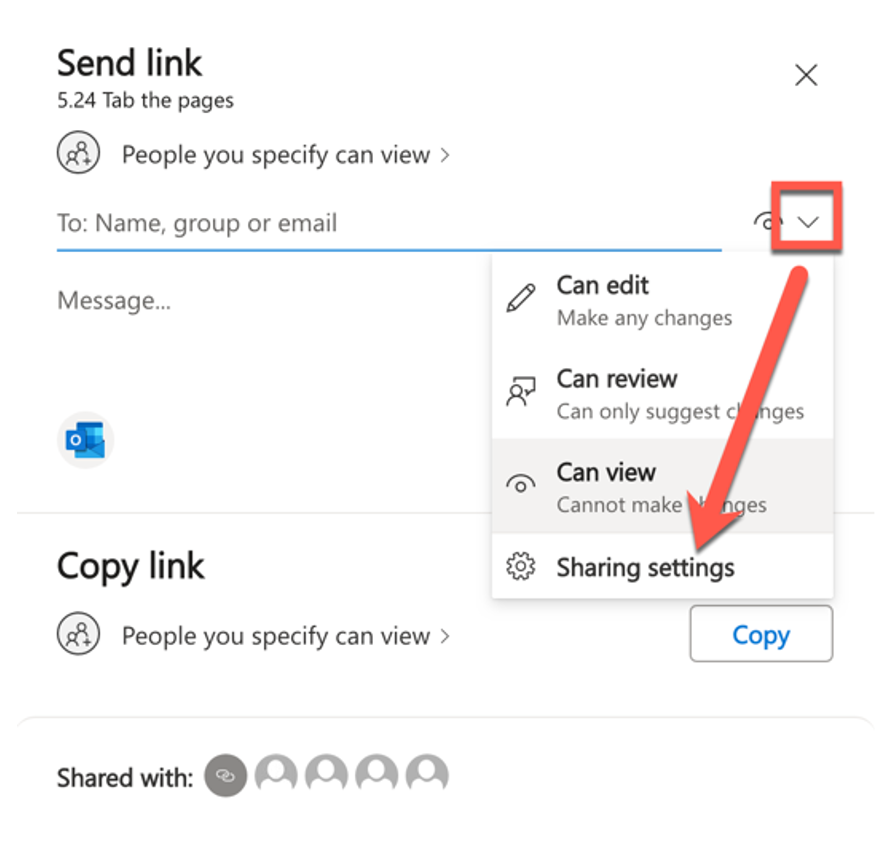
Once you’ve reached the OneDrive share menu, a new window will pop up that contains various sharing options. The default share type is People You Specify Can View.
To see more share options, click on the downward caret to the right of the pop-up window and select Sharing Settings from the menu that appears.
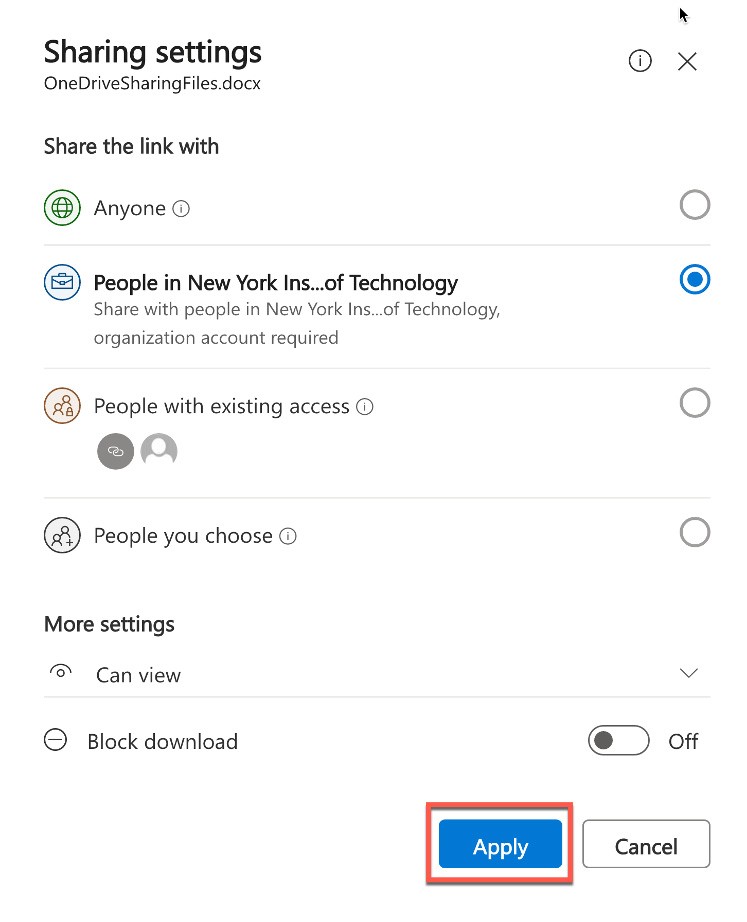
You will have four different options for recipients:
Anyone
This option is best if you want to share a file or folder with anyone: inside or outside of New York Tech. Once this option is selected, you will see a menu of More Settings options at the bottom of the window, including basic editing and viewing permissions, as well as some more specific options. You can set an expiration date for this document with a maximum length of six months, and you also have the option to set a password to access your shared file or folder.
People in New York Institute of Technology
If you’d like to share a file or folder with someone within our institution, select this option. Once this option is selected, you will see a menu of More Settings options at the bottom of the window, including basic editing and viewing permissions.
People with Existing Access
Choose this option if you’re simply re-sharing a file or folder. Once selected, you won’t be given any additional sharing options because you’re sharing it with people who already have access to the file or folder, so their permissions would have already been set.
People You Choose
Select this option if you’d like to share a file or folder with a specific recipient(s). These recipients can be inside or outside New York Tech. Please note that you cannot set an expiration date with this option; however, you can choose amongst the usual editing and viewing permissions.
No matter which option you choose, once you’re happy with your selections, click the Apply button.
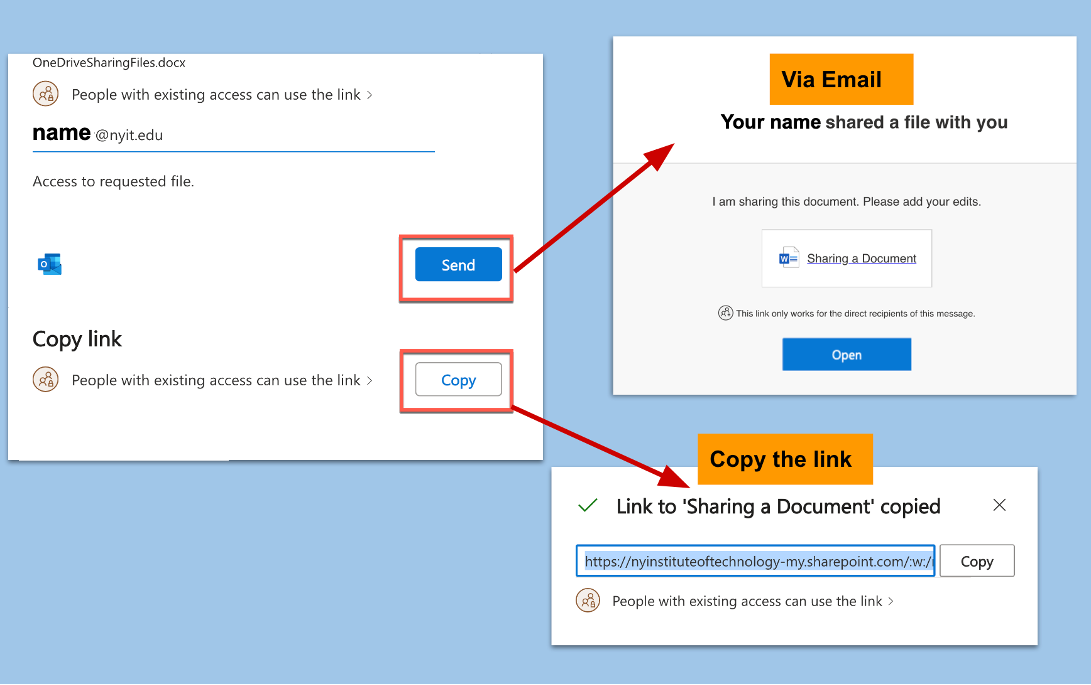
When you click on the Apply button, a new page will appear where you will be given two options for how you’d like to share the file or folder:
- Send: Share the file or folder directly via email; or
- Copy: Generate a link which you can then share.
Please Note:
When you share folders with Edit permissions, people you share with can add the shared folders to their own OneDrive. Any updates they make will sync with the shared folder, so everyone with access to the folder is up to date.
If you change a sharing option (Can Edit, Can Review, or Can View), you will need to create and share a new link. This is to ensure that your recipient(s) will be able to access the document in the way that you want.
Contact Us
If you would like to receive support on sharing files and folders on OneDrive, please contact the ITS Help Desk during our hours of operation, using one of the following contact paths:
- Website: nyit.edu/its/get_help
- Phone: 516.686.1188
- In person:
- Long Island: Harry Schure Hall, 2nd floor
- New York City: 1855 Broadway, room 703