Remote Instructions: Okta Verify
New York Tech partners with Okta for enhanced cybersecurity using Single Sign-On (SSO) and Multi-Factor Authentication (MFA) measures like OKTA SSO and Okta Verify, bolstering our defenses against cyber threats faced in all industries, similar to MFA in everyday activities like online shopping or banking.
Okta SSO simplifies access to multiple New York Tech apps and services using just your New York Tech username and password, eliminating the need for multiple passwords. This convenience is set up during your onboarding at New York Tech.
Multi-Factor Authentication (MFA), on the other hand, is an advanced authentication method that verifies your identity by necessitating the provision of at least two forms of evidence. At New York Tech, your username and password serve as the initial piece of evidence, while the second layer of authentication involves Okta Verify (or Okta MFA). This double-layered approach ensures higher security and reinforces our commitment to keeping New York Tech's digital environment cyber-safe.
You must download/enroll in the Okta Verify App to access New York Tech systems and resources:
- Download the Okta Verify app on your device(s) by clicking the appropriate link below:
Here are several examples of when you may be prompted to provide your New York Tech credentials and MFA:
- Logging in from different locations over short periods of time
- Logging in from off-campus locations—especially some international locations
- Multiple failed log-in attempts
- Changes in the typical access method, like accessing resources from a new device.
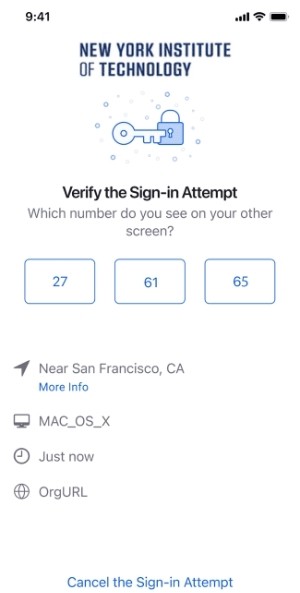
Okta Verify Number Challenge
The number challenge feature enhances security by generating a random number on your device's log-in screen and prompting you to select the corresponding number from the provided numerical options in the Okta Verify app.
You will only be prompted to complete the number challenge process when Okta Verify detects a high-risk or suspicious log-in attempt. Some examples of such situations include:
- Logging in from a new device
- Logging in from an unfamiliar location
- An unusual number of log-in attempts
STEP 1: Sign in to the desired New York Tech resource using your NYIT Account credentials.
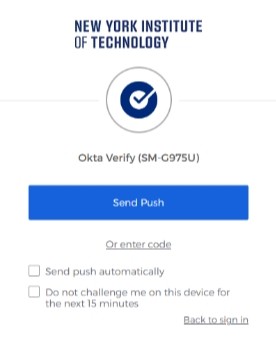
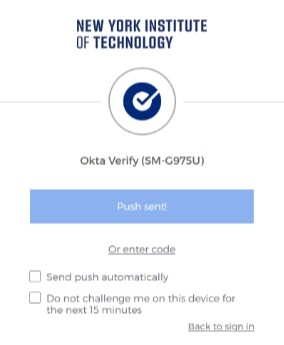
STEP 2: Look for the successful completion screen.
STEP 3: Locate the challenge number displayed on your device's screen.
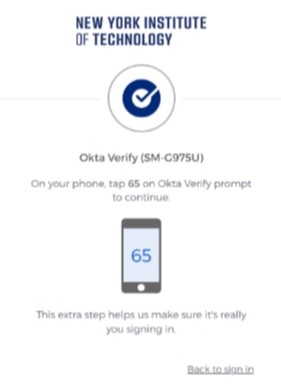
STEP 4: Select the matching number in the Okta Verify app.
STEP 5: Upon selecting the correct number, you will be redirected to the requested New York Tech resource.
Are you using a single device and need assistance? You may have to switch between apps to complete the number challenge on a single device. Follow the device-specific instructions below:
Instructions on how to enroll or transfer OKta Verify:
How to Enroll in Okta Verify for Faculty, Staff, and Student Workers ONLY

STEP 1: Go to nyit.okta.com and sign in using your NYIT username and your password. Choose a question from the Choose A Forgot Password Question pull-down menu and type the answer in the Answer field. Also, click on a picture to select it for use as your security image. Click on Create My Account to load the Okta Dashboard.
STEP 2: Click on Settings from the upper right pull-down menu. Once the setting page loads, click on Set Up next to Okta Verify from the Extra Verification section.
STEP 3: Follow the prompts to setup Okta Verify. You will need to enter your mobile device type (iPhone or Android) and download the OKTA Verify Mobile App. After launching the app, follow the prompts to add an organization and scan QR code.
STEP 4: Sign out and test your account by signing into apps3.nyit.edu/oktaOnboard. Follow the prompts to send and confirm a push notification .
For further assistance please contact ITS Help Desk at 516.686.1188.
How to Enroll in Okta Verify for Students ONLY
Transferring Okta Verify To A New Mobile Device (Old And New Device Required To Transfer)
Please note: You may only have Okta Verify on a single device; to transfer your OKTA Verify to a new device, you will need to have your old device. If you do not, you will need to contact Information Technology Services (ITS) at 516.686.1188.
STEP 1: Go to nyit.okta.com and sign in using your NYIT username and your password. Click on Settings from the upper right pull-down menu. Once the setting page loads click on the Edit Profile button.
STEP 2: Remove Okta Verify from the Extra Verification section. Confirm that you want to remove the enrollment. Sign out when enrollment has been disabled. You may need to send a push to your old mobile device to proceed.
STEP 3: Sign into nyit.okta.com once again and follow the prompts to setup Okta Verify on your new mobile device. You will need to enter your mobile device type and download the OKTA Verify Mobile App. After launching the app, follow the prompts to add an organization and scan QR code.
STEP 4: Sign out and test your account by signing into apps3.nyit.edu/oktaOnboard. Follow the prompts to send and confirm a push notification.
For further assistance please contact ITS Help Desk at 516.686.1188.
Example of Systems that use Okta Verify:
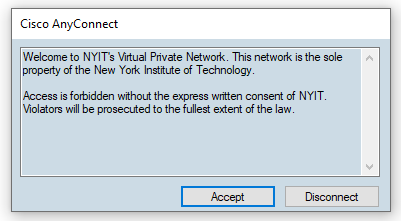
Cisco AnyConnect Usage
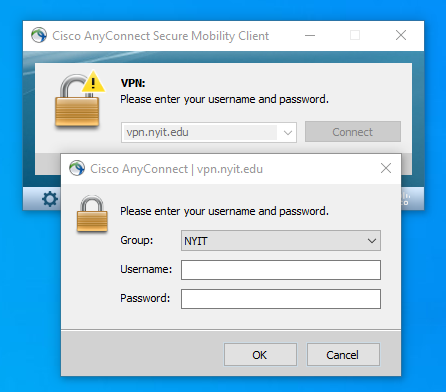
Step 1 – Launch Cisco AnyConnect VPN:
- Launch the Cisco AnyConnect VPN client and click Connect
- Enter your NYIT username and password and click OK
- Please note, RSA tokens (8-digit code) are no longer required in the password field
Step 2 – Respond to Okta Verify Push Notification on mobile device
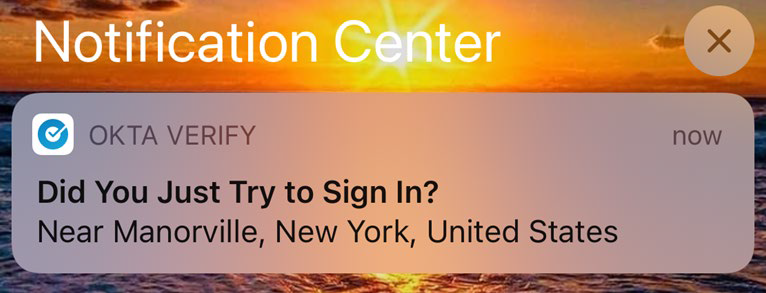
- If you receive a notification, tap it to continue to the next screen.
- Confirm login attempt
Once the sign-in request has been verified in the Okta Verify application, on your mobile device, you will be presented with the VPN connection dialog.
- Click Accept to begin your VPN connection
You may close the Okta Verify application on your mobile device.
Citrix Desktop Usage
Step 1 – Log on to the Citrix Desktop (Netscaler)
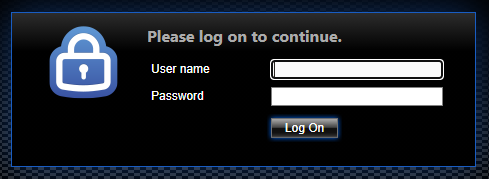
- Open the following URL in your web browser on your computer: https://desktop.nyit.edu
- Enter your NYIT username and password and click Log On
Step 2 – Respond to Okta Verify Push Notification on mobile device
- If you receive a notification, tap it to continue to the next screen.
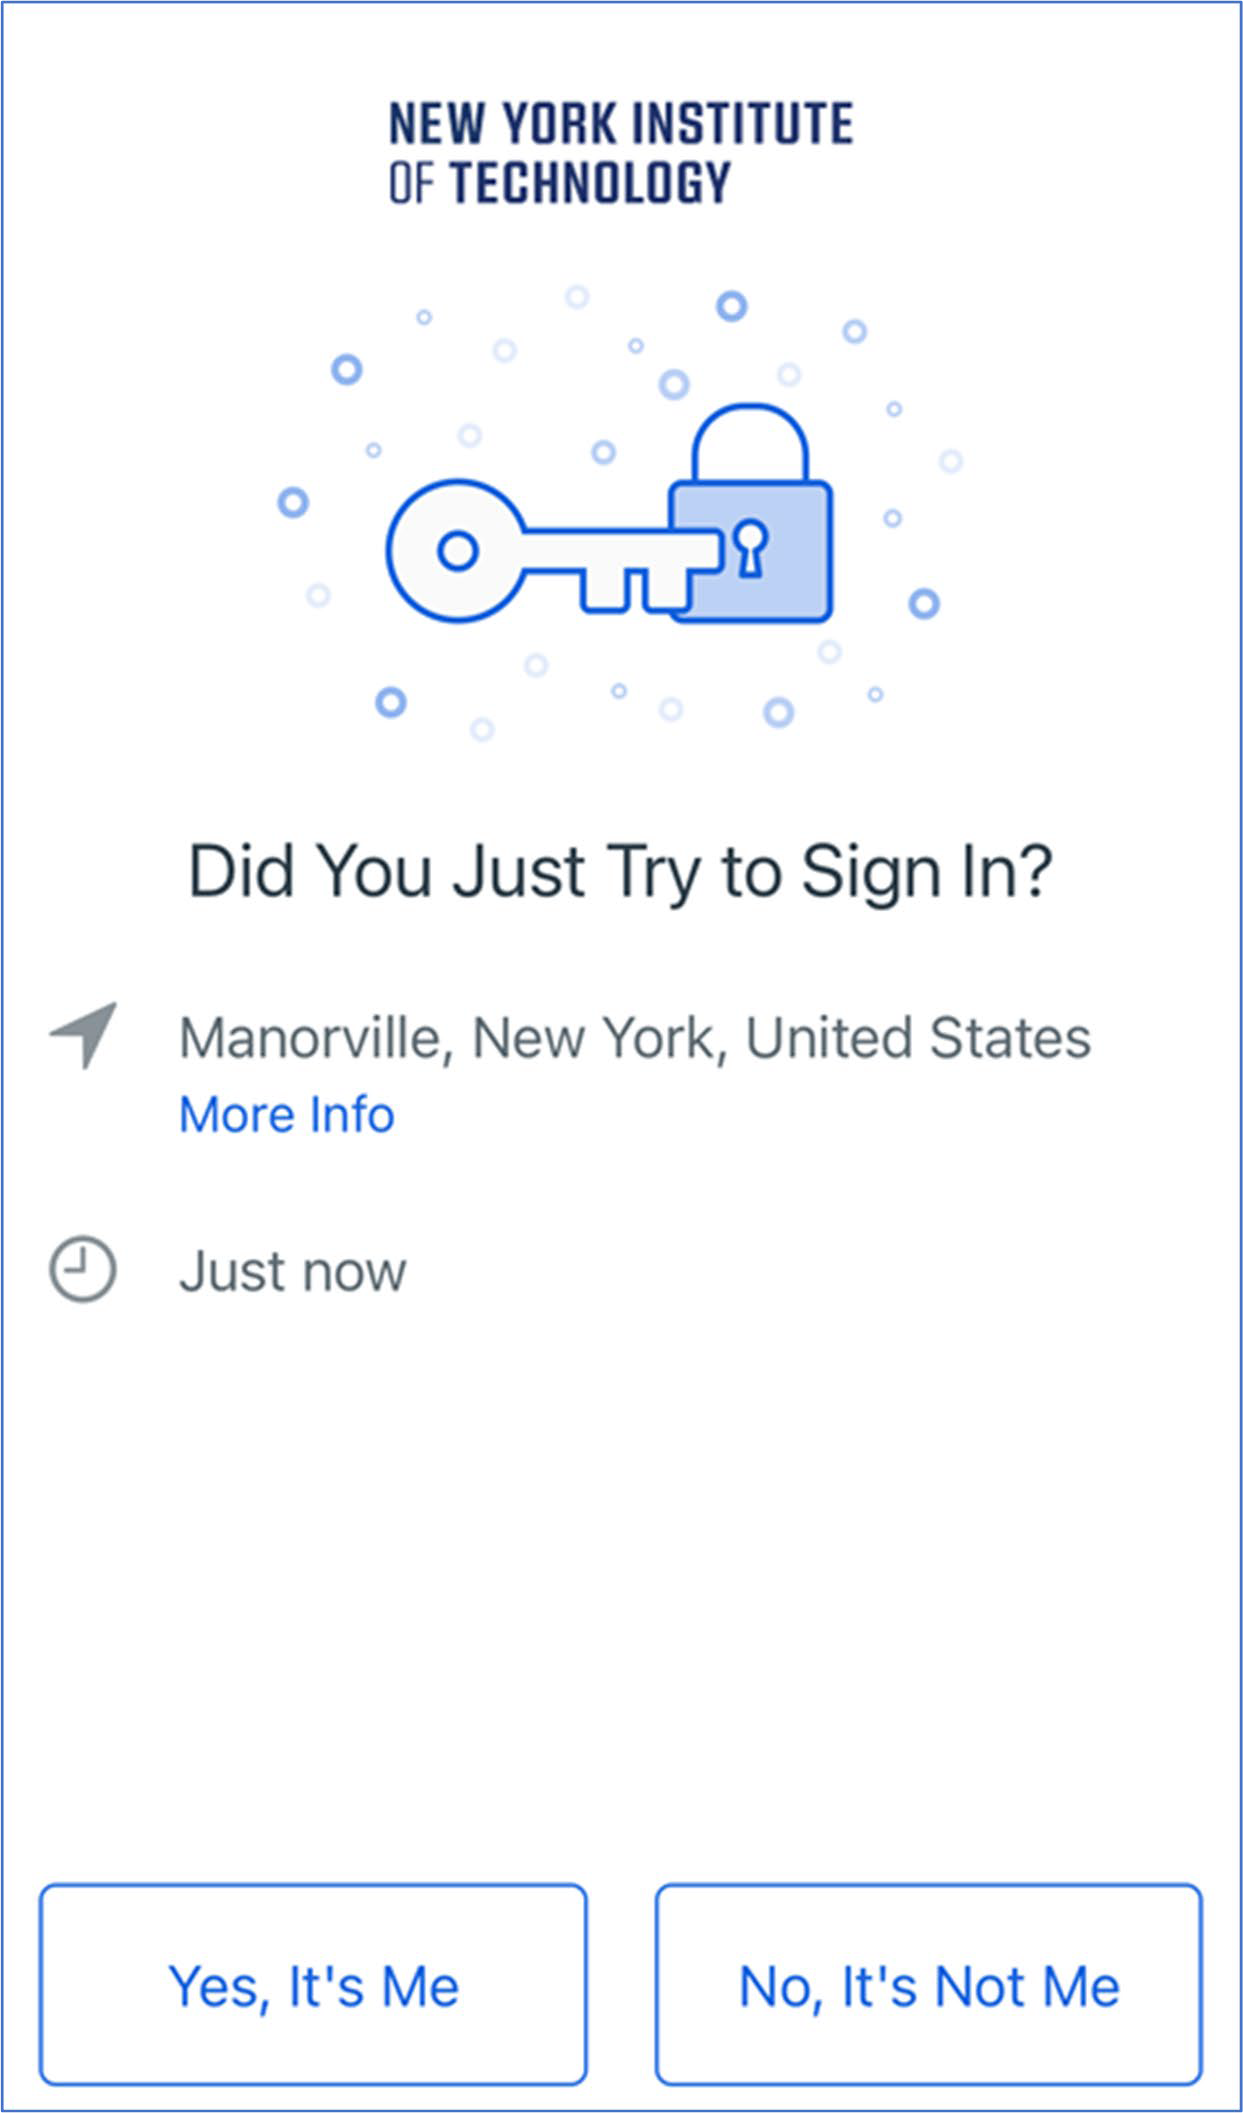
- To confirm login attempt, select Yes, It's Me
- Once the sign-in request has been verified in the Okta Verify application, on your mobile device, your Citrix desktop receiver will open and your desktop session will be initiated on your computer.
Your desktop will appear the same as it did before. Nothing changes with the use of the Okta Verify app other than the ease of use and additional security.

Please Note: The Okta Verify mobile application may display a 6-digit code. You can ignore this code as it's not required for the authentication process.
You may close the Okta Verify application on your mobile device.
Employee Self‐Service
When Accessing Employee Self‐Service While on Campus
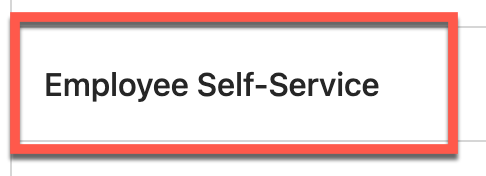
- Click on the Employees Tile on my.nyit.edu dashboard.

- Then, click on Employee Self-Service in the menu.
- Once this new log-in screen appears, simply use your standard NYIT account credentials to login.
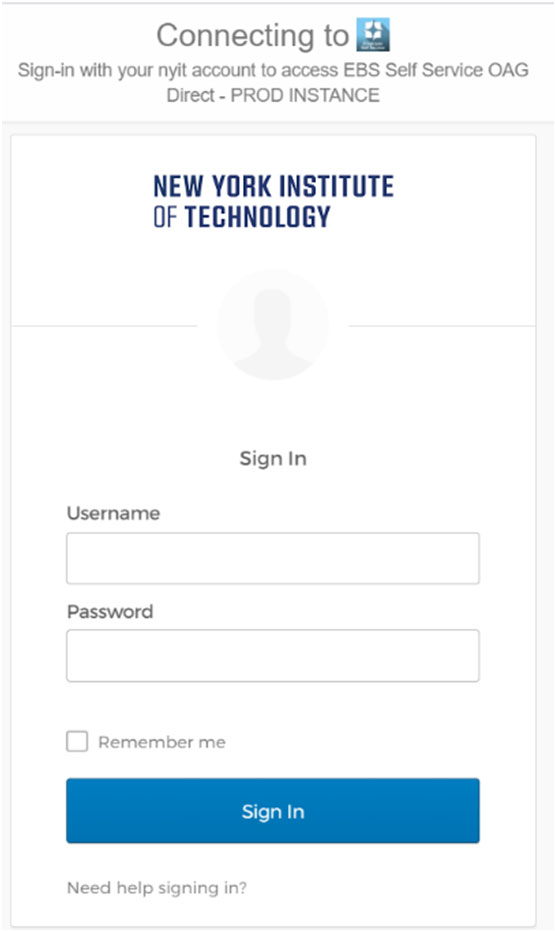
- Click Sign‐In and you'll be brought to the main screen of Employee Self‐Service.
When Accessing Employee Self‐Service While off Campus
- Click on the Employees Tile on my.nyit.edu dashboard.
- Then, click on Employee Self-Service in the menu.
- Once this new log-in screen appears, simply use your standard NYIT account credentials to login.
- Click Sign‐In and you'll be prompted on screen on your mobile device by Okta MFA to verify your identity with the notification below (if you chose not to enroll a mobile device, you will use the alternate authentication method you selected during enrollment).
- You will receive a notification on your mobile device
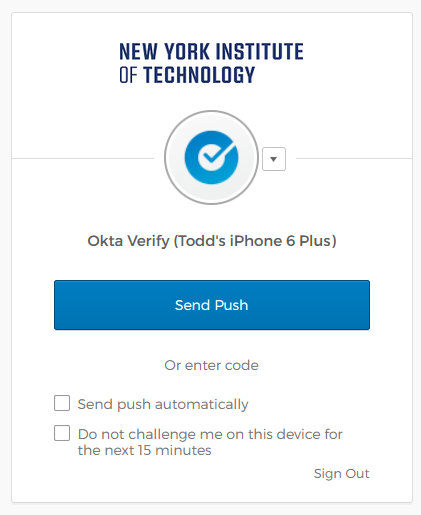
- Click Send Push
- Tap it to proceed to the final step of verification as shown below
- Select Yes, It's Me and you'll be brought to the main screen of Employee Self‐Service